Setting up Elasticsearch and Kibana on AWS
Quickstart on rich and simple data analytics using the EXK stack
Quicklinks
Creating the AES Domain
- Choose Deployment type:
- Deployment type:
Development and testing - Version:
7.1
- Deployment type:
- Configure domain
- Elasticsearch domain name:
movies - Instance type:
t2.small.elasticsearch - Number of nodes:
3 - Data nodes storage type:
EBS - EBS Volume type:
General Purpose - EBS storage size per node:
10GiB - Dedicated master nodes:
- Optional ES cluster settings > Allow APIs that can span multiple indices and bypass index-specific access policies >

- Elasticsearch domain name:
-
Configure access and security
- Public access
- Fine-grained access control: skip
- Enable Cognito Authentication:
- Create Cognito User Pool.
- In User Pool, add App integration > Domain name.
- Create Cognito Identity Pool. Check User Pool App integration for App client ID.
-
Enable access to unauthenticated identities in Identity Pool
-
JSON defined access policy:
{ "Version": "2012-10-17", "Statement": [ { "Effect": "Allow", "Principal": { "AWS": "*" }, "Action": "es:*", "Resource": "arn:aws:es:us-east-1:<ACCOUNT_ID>:domain/<DOMAIN_ID>/*", "Condition": { "IpAddress": { "aws:SourceIp": "<YOUR_IP>/24" } } } ] } - Require HTTPS for all traffic, enable node-to-node encryption. (t2.small does not support encryption at rest)
Loading and Reading Data into Domain
-
From working directory, run
awscurl --service es -XPOST $ES/_bulk -H 'Content-Type: application/json' -d "@bulk_movies.json"awscurlis a python package that wraps around curl to authenticate via AWS Signature V4 Signing Process. Install it viapip.Output:
{"took":19053,"errors":false,"items":[{"index":{"_index":"movies","_type":"_doc","_id":"2","_version":1,"result":"created","_shards":{"total":2,"successful":2,"failed":0},"_seq_no":0,"_primary_term":1,"status":201}},{"index": ... -
Query inserted data:
awscurl --service es -XGET "$ES/movies/_search?q=Thriller"Output:
"took":82,"timed_out":false,"_shards":{"total":5,"successful":5,"skipped":0,"failed":0},"hits":{"total":{"value":2,"relation":"eq"},"max_score":0.41501677,"hits":[{"_index":"movies","_type":"_doc","_id":"2","_score":0.41501677,"_source":{"director": "Frankenheimer, John", "genre": ["Drama", "Mystery", "Thriller", "Crime"], "year": 1962, "actor": ["Lansbury, Angela", "Sinatra, Frank", "Leigh, Janet", "Harvey, Laurence", "Silva, Henry", "Frees, Paul", "Gregory, James", "Bissell, Whit",...
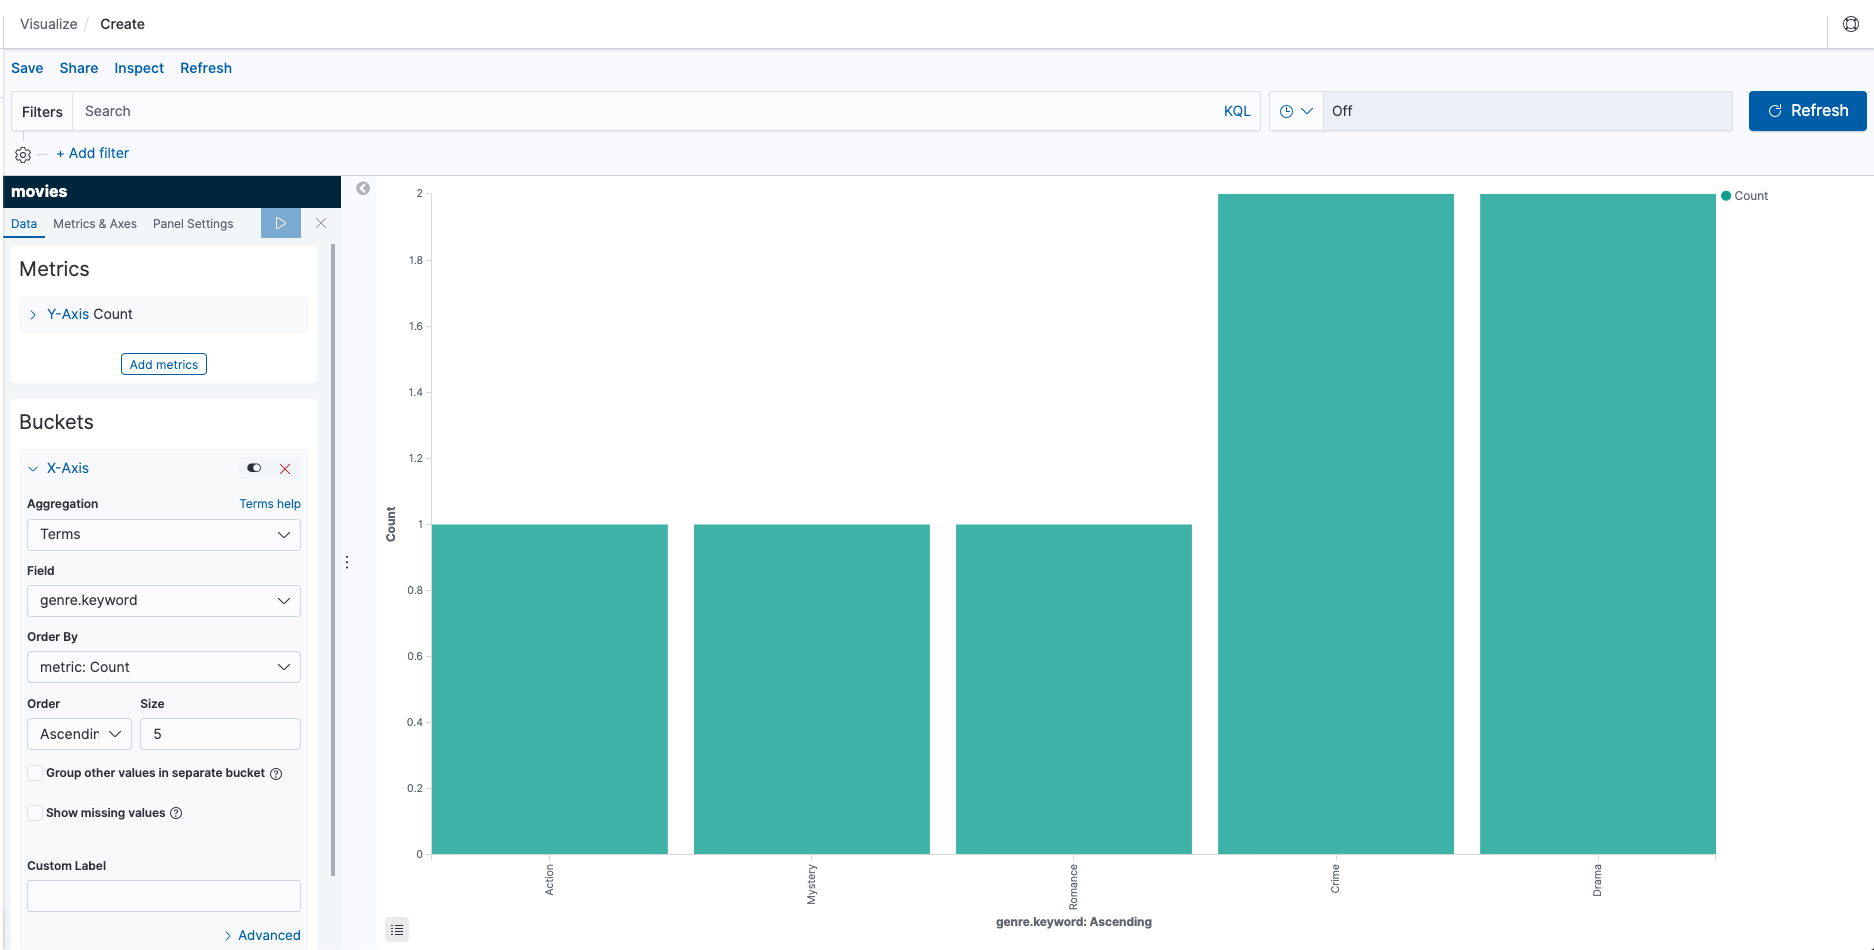
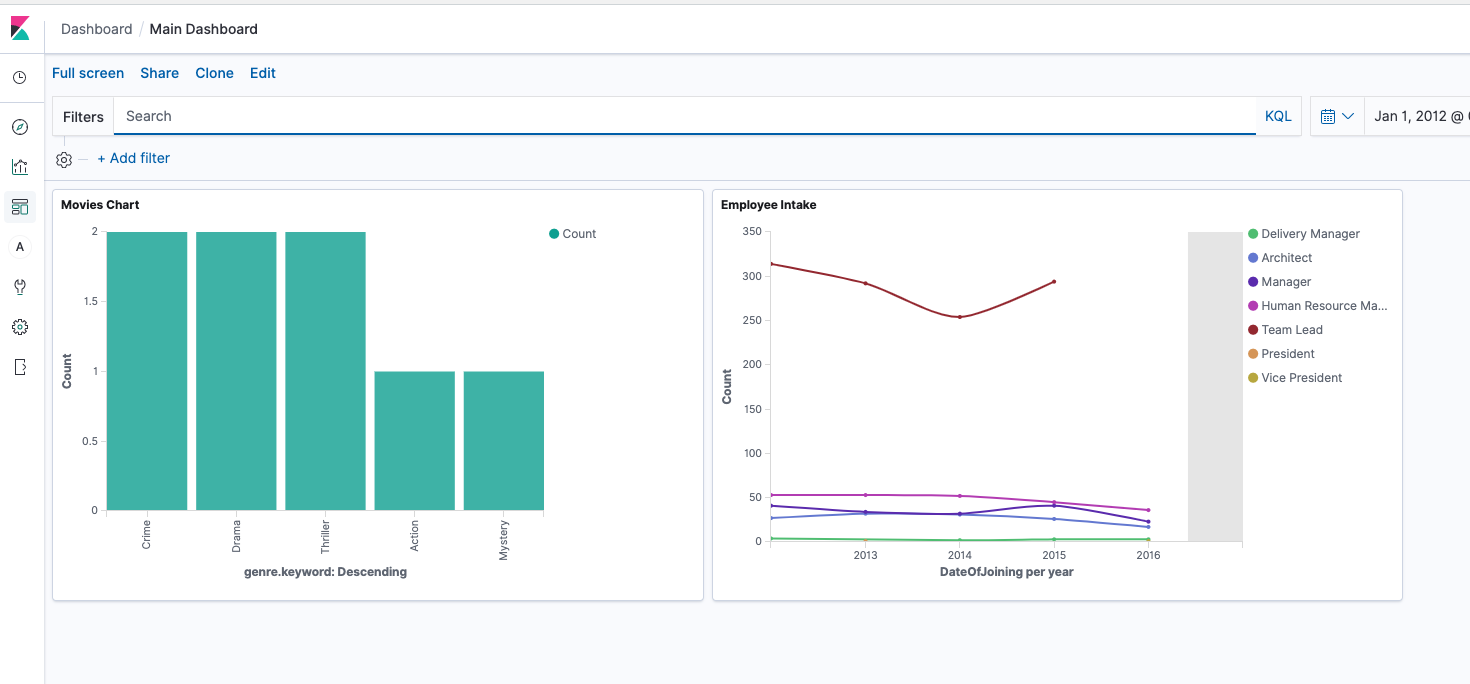
Viewing Data on Kibana
- Create
adminuser in User Pool with a password - Check that Identity Pool is created
-
Add the following into domain Access Policy:
{ "Effect": "Allow", "Principal": { "AWS": [ "arn:aws:iam::<ACCOUNT_ID>:role/Cognito_<ES DOMAIN>Auth_Role" ] }, "Action": [ "es:ESHttp*" ], "Resource": "arn:aws:es:<REGION>:<ACCOUNT_ID>:domain/<DOMAIN-NAME>/*" } - Open Kibana endpoint and Log in.
- Create index pattern as
movies. - Create visualization. Try a vertical bar graph and set X-Axis to
Aggregation:Terms,Field:genre.keyword.
This demo does not cover concepts on cluster sizing, dedicated master and replication, deploying AES in a VPC with fine-grained access controls.
/shrug
[edit] This guide deployes an ES cluster that is publicly accessible and access control is managed via IPv4 address whitelisting. If you are looking to use ES clusters deployed in a private network (in a VPC), feel free to check out this updated guide: HERE